Wild cats

So, I realized this week that I have made 16 Halloween costumes in the 8 1/2 years I've been a mother. I can rattle them off in chronological order for anyone who's interested. (I'm fairly impressed with this feat.)

costumes4

costumes3

costumes1

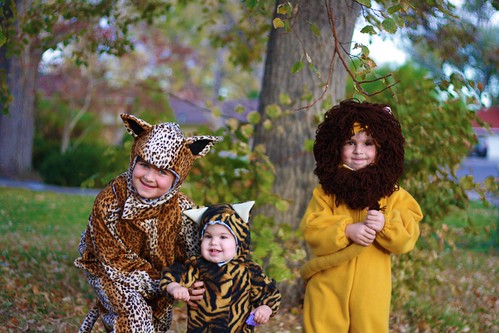
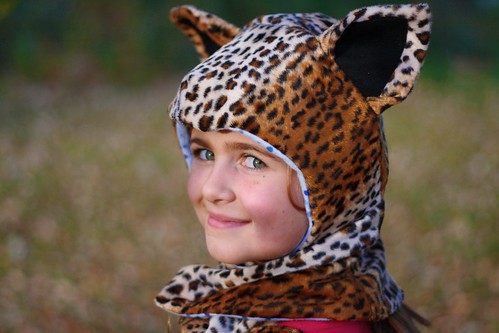
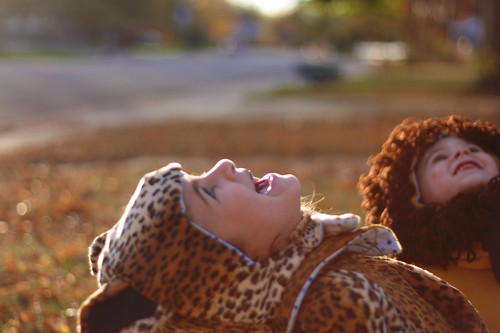
True to form, Elisabeth decided what she was going to be (a cheetah -- don't let those pointy ears deceive you into thinking she's a leopard -- that was purely my oversight in following the pattern rather than looking at an actual picture of a cheetah -- which led to some very real disappointment, but I was impressed by the maturity and positive attitude my very high-intensity daughter showed despite this tragedy), and her siblings obliged her theme concept. (Well, Fiona didn't have any input into the decision.) I guess someday, someone will decide that they don't want to do the whole matchy-matchy thing, but for now we're really enjoying it. (My siblings and I did theme costumes several times and those are the years that stand out the most in terms of costumes. So, it's worth it, I think.)

costumes16

costumes15

trick or treat7

trick or treat3

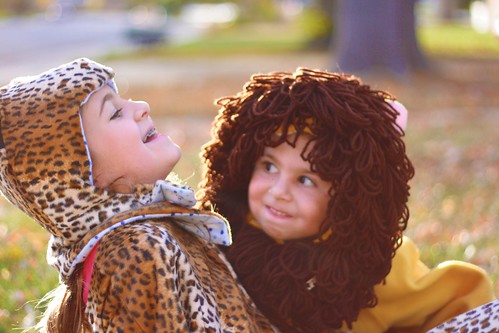
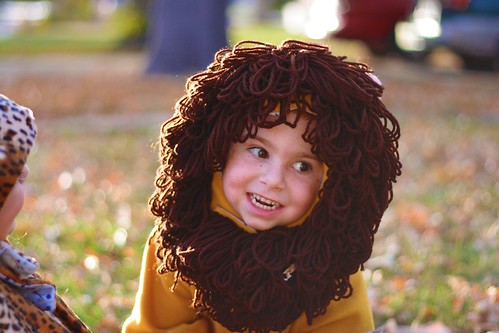
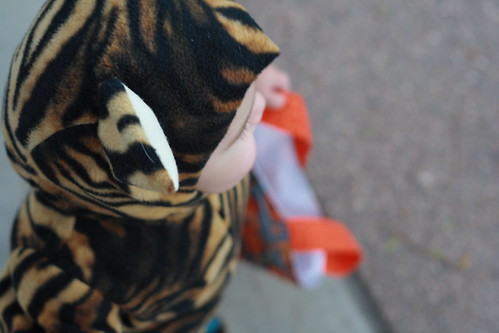
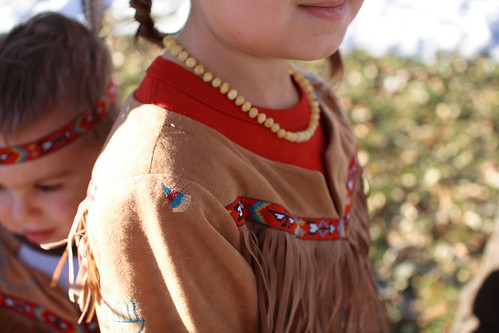
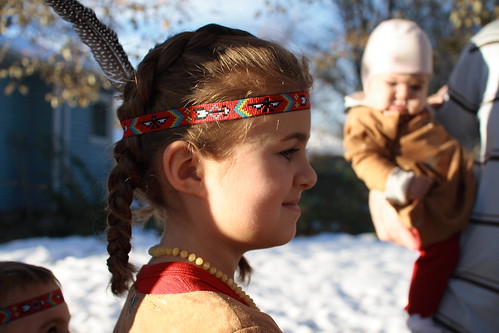
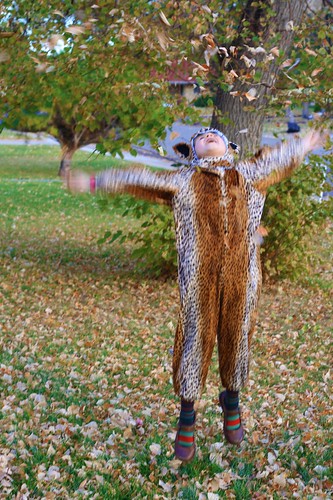
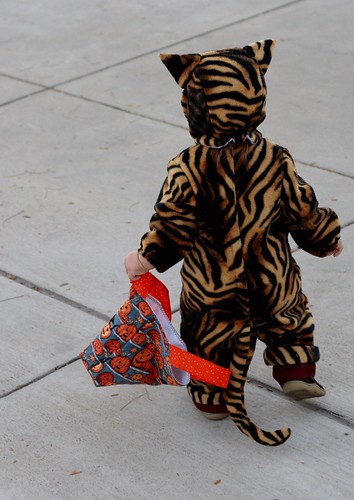
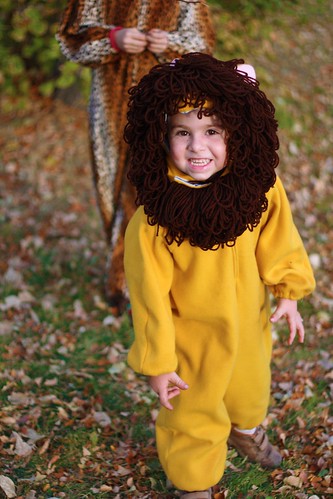
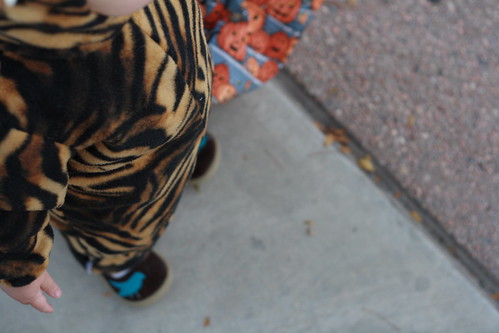
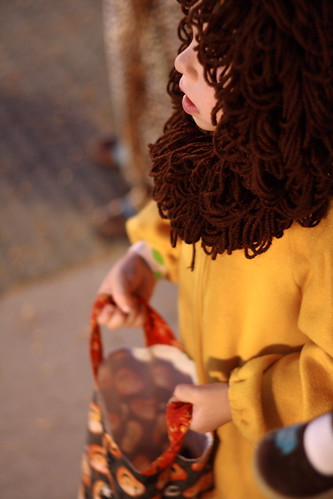
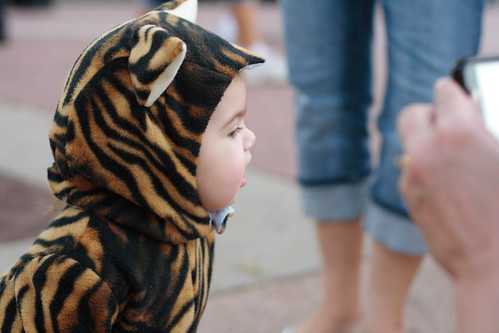
So, to go with Elisabeth the Cheetah were James the Nice Lion and Fiona the little Tiger. Oh, they had so much fun rolling around in the leaves in their costumes. We have some new neighbors up the street, and when we trick-or-treated at their house, they commented on how joyful it was to see our three wild cats rolling around and frolicking out front.

costumes6

costumes7

costumes8

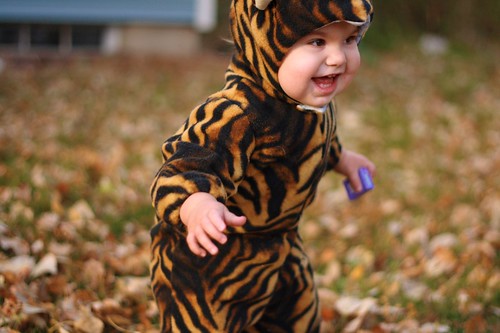
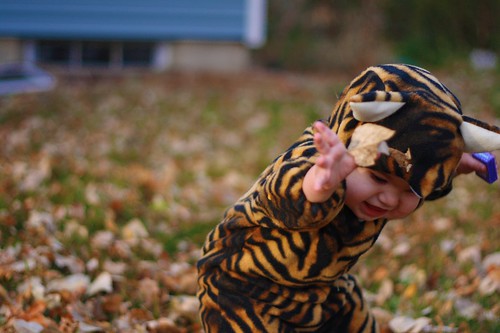
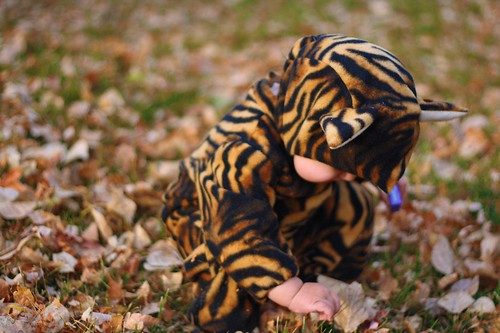
Fiona was especially excited about her costume in a way neither of my other two were at one-and-a-half. Her costume was ready last, so she had already seen Elisabeth and James playing around in theirs for a day or two. When I finally tried it on her, I wasn't sure what she would think of it. But she was so excited, and so obviously aware of the purpose of a costume. She immediately started prancing around. It was so cute! She was a lot of fun trick-or-treating, too. She was so excited to point at all the other costumes we saw, skipping along in a funny little way. She had a great time, which was such fun for everyone.

costumes20

costumes21

costumes17

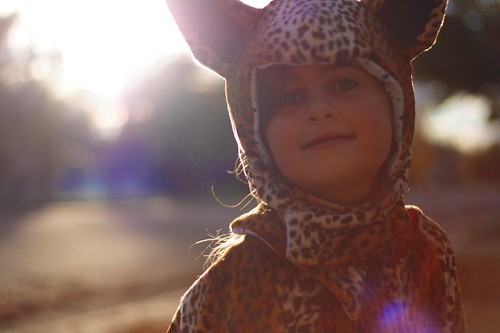
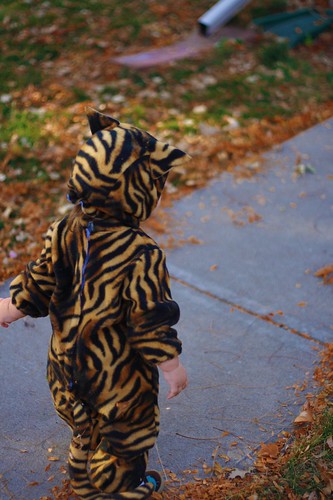
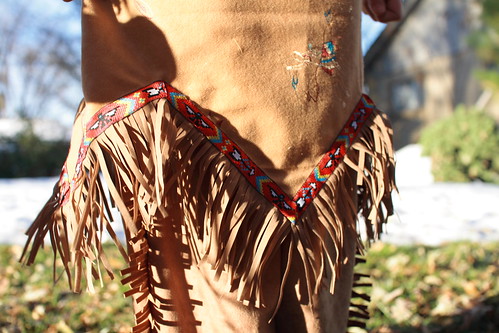
The cheetah and lion costumes were made using McCall's 6106 (also labeled MP373 or 8953), although I used the yarn mane shown on the pattern for Fiona's costume, which was Simplicity 3594. (For the tiger, I made the lion costume, view C, but omitted the mane and added pointed ears instead of rounded.) For the lion and tiger, I used fleece as the main fabric, and for the cheetah, I used a light-weight faux fur. I saw some cheetah-print fleece a week or two after I bought the fur, and I do kind of wish I'd used it instead (it's a softer, warmer costume, and easier to sew), but the fur worked out just fine.

trick or treat1

Like so many crafters, a lot of my sewing skills were learned and then polished on Halloween costumes. In fact, I used to only sew once a year. But many of our costumes have been made from commercial patterns, and I have to say that I find that to be a good way to learn how to sew -- even the easier ones use skills like undersewing and stay-stitching. I think I'm a better sewer because I've used a lot of commercial patterns than I would be if I had only used more casual ones (not that there is anything wrong with the patterns and tutorials online!).

costumes5

Another thing I realized when making these three costumes this week was how much I love sewing garments. They are like a puzzle, so fascinating to assemble and see come together. I need to remember how much I love this, and do more of it! There is a satisfaction for me in garment sewing that just doesn't seem to be there in other kinds of sewing, but I often forget that.

trick or treat9

trick or treat4

I think I'm going to set a little (hopefully attainable) sewing goal for myself in the new year, to sew more garments. I do well with some structure, but I don't want to create a lot of deadlines, either. Anyway, it's something to mull over during the next two (hectic) months.

trick or treat8

trick or treat5

In the meantime, I'll just smile as these cat costumes are pulled out day after day for lots of play. It makes me so happy.


PS: You can go over to My Sewing Circle to read more of my comments about the patterns. And don't be shy about leaving comments! It is so motivating for me to get through every single day of NaBloPoMo if you are all joining in the conversation! (Plus, I know that lots of you are stopping by -- please say hi!)

Would you like a doll?

Edited: Wow! All spots are full! Thank you so much! If anyone decides not to take their spot afterall, I'll be sure to post something here should a spot become open. I doubt this will be the last time I'll make dolls, so if you didn't get one this time, be patient! Thank you again, I'm so flattered by your kind words and support.

Oh! By the way, I do have one complete doll already available, should anyone be interested in her.

I have had many requests for custom dolls over the years, and when I've accepted commissions, it's usually been a spontaneous decision and I haven't planned well-enough in advance, so I've had a hard time delivering them on a deadline, making it a mad-dash at the end. I've given dollmaking some thought recently, though. I haven't made a doll in quite a while, and I miss it.

gabriel2

So I've decided to take a limited number of commissions this summer.

happy amy

A realistic number for me is two dolls in each of the months of June, July, and August, so a total of 6 dolls. Please note that if you would like one of my dolls for the holidays this year, try to get a summer one as this will be the only opportunity. I won't be making dolls in the autumn and winter, in order to better focus on my own family during that time.

rosy cheeks!

If you are interested, please email me at uncommongrace (at) comcast (dot) net. We can discuss payment and doll style from there. I'm excited to hear from you, and to be able to make your handmade doll dreams a possibility! I'll fill the spots on a first-come, first-served basis, so please get in touch soon if you're interested. All full! Thank you so much!

i really wanted to keep him

(You can see more of my dolls here, although please be aware that each is one-of-a-kind, and I'm not able to precisely duplicate facial expressions, head shape, etc., though as an experienced doll maker, they are quite uniform. Also note that none of their outfits are precisely duplicable, as it depends on the fabrics available to me right now.)

Very Belated

One good thing about being my friend is that I might make you a cool birthday present. However, the downside to that is that you can't really expect it on your birthday. Or maybe for several birthdays.

bag1

I made this bag for a friend's birthday in February of 2008. (No, it's not crooked in real life; that's just the tree.) I didn't like the way the interior pockets turned out, so I partially ripped them out and then never finished the bag. It sat for more than two years, and was even transported through our move. This is how I am.

Anyway, I finally reconstructed the pockets and gave the bag to my friend. And she really liked it, despite the wait!

The pattern is the Tiny Happy Shoulder Bag tutorial, which I've made three times. (This was the first one, and the other was a dolly diaper bag for Elisabeth's 6th birthday, which you can see here.) After working on this again last week, I think it's time to make another of these! I really like them.

bag2

For this bag, I increased the length of the strap so she could carry it messenger-style, and also the overall size of the bag, so it can accomodate a good sized knitting project as well as some other gear. (My friend ends up having to carry a lot of stuff around with her, as a busy mom and midwife!) I used fusible fleece in this bag, as I did with the first one. I really like the added structure it gives the bag. In hindsight, I wish I had adhered the fleece to the lining fabric and then maybe used a lightweight interfacing on the outer fabric. This would have kept the outer fabric looking just as smooth and structured as it does, but added some stability for the pockets in the lining. However, it still works and looks nice.

bag4

I'm sorry that I don't know what this fabric is. I'd already had it in my stash for about a year before I made this bag, which was two years ago. So I don't have any information on that. The button is vintage from my stash and matches the small dots on the fabric perfectly!

bag3

I designed the pockets to accomodate a 1-liter Sigg water bottle, a cell phone, and a good-sized wallet. I used the outer fabric and some fold-over elastic. The bottoms of the pockets have gussets. Constructing the pockets, and figuring out how to attach them without causing the lining fabric to pull, was the trickiest part of this project. You can see that the lining is still wrinkled from the way the were attached before. I ended up figuring out a good way, and they are going to work really nicely, I think. There is also a standard flat pocket which can be used for smaller or more light-weight objects.

I may take my time on delivering things, but I'm happy that they are at least well-received!

Kids' Clothes Week Challenge progress

I had a little bit of sewing time today. I completed a quick and easy pair of much-needed pajamas for James, and a skirt for Elisabeth.

construction pajamas2

construction pajamas4

construction pajamas11

The pajamas were made using some flannel that I picked up as a remnant at JoAnn last year. It was probably about 3/4 of a yard; the perfect amount for a pair of pajama pants for a four-year-old. The "pattern" is an old tracing that I did years ago, and I've been adjusting it since then.

construction pajamas7

construction pajamas10

I picked up the t-shirt at Target a couple of years ago, thinking that I'd hang onto it to applique once it fit him (I liked the color combination of the yellow and navy). It doesn't coordinate perfectly with the pants, but I had it on hand, which made the project easy to start and complete in one sitting!

secret garden skirt

The skirt fabric is My Secret Garden (in blue) by Alexander Henry. I really wanted to get this in the pink colorway but that is nowhere to be found anymore. The skirt coordinates with a t-shirt that she got in her Easter basket this year. (It's in the wash right now, so pictures of the two together will have to wait. Also it's only about 34 degrees today, so this was the fastest spring skirt photo shoot on record!)

secret garden skirt2

I made the skirt in the same way that I made this one (almost exactly a year ago -- and wow, looking at those pictures, she has changed a lot in the last year!), but I used a 24" length of fabric so that it would be long enough for her to wear to church and other "nice" occasions.

On my list yet to complete:

*Two dresses for Fiona -- both are already begun

*One pair of pull-on pants for Fiona

*Two more skirts for Elisabeth (and maybe if I'm ambitious, a dress!)

*More pajamas for James and some for Elisabeth (or nightgowns for her)

*Shorts for James

*One or two shirts for James (maybe the Sketchbook Shirt from Oliver + S, or Kai's Shirt from Weekend Sewing)

I'll continue to post my progress this week, and maybe cross things off in this post as I go.

edited: I almost forgot! Did you see tonight's LOST? I almost died, they were really giving a lot of back story! Woohoo! (And *weep* that there are only two episodes left, EVER!)

Mother's Day, and a sewing challenge

mother's day

tulips from our yard -- these were for my kids' grandmothers, but let's pretend they're for you!

Hoping that all you fantastic mamas out there had a fantastic, beautiful day yesterday; that your family loved you even more than usual; that your burden was light, if just for one day.

I'm a very fortunate mama. I was awakened (bright and early, as always on a Sunday morning ... we leave for church by 8:15) with kisses and cards and gifts and a breakfast of bacon and eggs. After a perfect day, including Mexican food and margaritas, new sunglasses, and a nap, we paid visits to the two grandmothers, and I finished the day with some fantasy yarn shopping, tea, and a movie on the couch. Such a sweet, sweet day.

In other "news"....

Kids-clothes-week-button2

I'm going to try to participate in Meg's Kids' Clothes Week Challenge this week. I need to get back into the sewing groove, and I've had a few projects sitting around in semi-finished states for a while now. I don't know how well it's going to go because Fiona is in a stage right now where sewing is a challenging activity. She wants to be held all the time, is transitioning out of two naps (making her one nap somewhat all over the place), and gets into anything within reach when awake. Of course, my sewing room is not babyproofed. Anyway, I really want to participate, so I'm going to try, but I'm not going to beat myself up if it doesn't work out.

The challenge begins today. I don't think I'll get to anything until tonight because I have students all afternoon, but I'm hoping to complete a few almost-done projects before moving on to some new things later in the week. Maybe you'll join me?

February 3

Tonight I'm in need of some birthday opinions from you all.

*James turns four next month, and I'm stumped on a gift for him. Any suggestions? Our criteria are: nothing electronic/battery operated, nothing plastic, and probably not vehicle-related (we have so much of that already). So those of you with little guys, what are some things that have gone over well?

*Also with a four-year-old in mind: can you share some of your favorite books? We like to give one book for each birthday, and despite going over the Chinaberry catalog with a fine-tooth comb, I don't have any inspiration.

*And finally, I'm looking for opinions about colors and ribbon for Fiona's birthday crown. (You can see our other birthday crowns here to get an idea of the style I'll be making.) The main color is definitely going to be green. I'm a synesthete, and I "see" colors associated with letters, numbers, names, and people. Fiona's color (for me) is a sort of spring or apple green.

(Sorry that the color in these is kind of bad -- it's been overcast the last couple days, but hopefully you can still get an idea.)

So, I have these two greens:

crown6

The darker one is pretty much avocado and the lighter one is more toward chartreuse. I wish I had one that was really the color I had in mind, but I want to use plant-dyed felt for this project and these are the only two greens I can get, unfortunately.

And these are some possible secondary color and ribbon combinations:

crown1

This one combines the chartreuse green, a salmon orange, and a 1.25"-wide vintage ribbon that my mother-in-law gave me a couple years ago. I like this combination a lot, although the ribbon is wider than I've used before, and the combinations is not super feminine. Fiona is such a dainty baby that I do want her crown to be feminine, so I'm not sure on this one.

crown2

This one combines the avocado green, a rose pink, and a 7/8"-wide vintage ribbon that I got from Les Bon Ribbon a couple years ago. This combination is much more feminine, which I like, but I'm a bit concerned that the blue and pink ribbon doesn't coordinate with the green and pink felt very well.

crown3

This one combines the avocado green,the salmon orange, and a cute ribbon I got in New York last year. I really like this combination, but my concern with it is that the ribbon is too narrow and that it's a kind of juvenile look -- maybe she won't like it when she's older? (Like 6, 7, 8 -- in that girlie-girl phase).

crown4

This combination combines the chatreuse green, a soft violet (much softer than it looks here, but not pastel, if that makes sense), and a 7/8"-wide linen floral ribbon that was also from my trip to New York. I have all but ruled this option out. Elisabeth thinks the violet is too dark, and I feel like the ribbon looks washed out on the darker felt. I really love the ribbon, but I'm not sure it's right for this project.

crown5

This last combination pairs the avocado green and rose pink again, with the widest ribbon of all of them -- at least 1.5" wide, maybe even 2" (sorry, I don't have it nearby right now -- but it's really wide). I don't remember where I originally got this ribbon, but I've had it a long time. It's "fancier" -- with the gold in it -- which might be popular with my little girl at some point. Elisabeth doesn't like this ribbon, and I was so unenthusiastic about the ribbon on James's crown (which is sort of similar), that I'm just not sure.

OK, now it seems like I hate all these options. I'm not really that negative! It's just that I'm feeling indecisive about this -- I really want it to look beautiful! Maybe it's just that I don't like either of the green felt options and should go another direction with that. Anyway, thoughts?

::So, to recap (please don't be shy): gift for four-year-old boy? Book for four-year-old? Opinions on the crown?::

Looking forward to hearing your ideas!!

Gingerbread

Gingerbread people are so good in so many ways, don't you think?

gingerbread2

Those made from felt and rick rack are especially nice on t-shirts.

gingerbread3

The tiny one was kind of a challenge -- she's just an inch high, and I should have hand-sewed her to the shirt rather than machine-sewed, because it was tricky. Oh, well!

gingerbread1

Everything is good as long as we have matching gingerbread people shirts.

Edited to add: Lands End carries some pants similar to the ones you see on Fiona, here.

The news

I'm popping in a bit earlier today to let you all know about the news I've been teasing you with.

I'm finally going to do a shop! After a few false starts this summer, I actually have some things that will be available in time for the holidays this year.

dolls!

There will be three handmade Waldorf dolls -- three girls named Addie, Sadie, and Lola.

And there will be at least a couple of bags. (Maybe more than a couple, depending on how this coming weekend goes.)

The opening is set for Tuesday, December 1. I'll let you know all the particulars next Monday (November 30).

I'm so excited that things fell into place over the last couple of weeks for me to be able to offer just a few handmade goods to you for the holidays. A shop has been something that I've wanted to do for a really long time, but it hasn't come together before now. I'm even dreaming of doing more frequent updates in the new year (although I'm trying not to get ahead of myself).

So, see you then! (And every day for the next week, finishing up NaBloPoMo.)

A polka-dot deer

deer shirt1

Today I have a little deer shirt to share, a gift for a four-year-old friend.

deer shirt2

And also, a little three-year-old foot. Because I can't resist.

foot

Hoping your weekend is going beautifully!

Saturday night

How is your weekend going so far? Ours has been sweet and slow-paced. Tonight, it's snowing again, my children are all asleep, I've got a cup of my favorite cocoa brewing. (We have that a lot around here, it seems!)

cards

I spent some time this afternoon trying to design this year's Christmas card. So far, I don't quite have it. Something seems to be missing. Back to the drawing board.

Wishing you a sweet end to your weekend!

Our Martinmas -- and lantern tutorial

martinmas

We celebrated a beautiful Martinmas last night with a group of homeschooling friends. There were moments that were so quiet and reverent, looking around the circle of us singing together, and there were moments that were rowdy and a bit challenging to manage. But overall, it was such a delight to celebrate as a group. 

I didn't get very many pictures (just these three, in fact, and I was missing my lens!), but the few I have tell a story, I think.

martinmas table

We met in a large park and shared a simple meal (of pumpkin soup, bread, and cider). Then we set out, a merry little band, singing. We stopped at a couple of houses in the neighborhood, and then wound our way back into the park. In a stand of trees, we stopped and I told the story of St. Martin to our group. All was still and dark, except for our lanterns. Finally, a quieter group found its way back to the tables to pack up and bid one another farewell.

small lantern

There were moments that weren't perfect. But it was beautiful -- magical, even.

* * * * * * * * * * * * * * * * * * * * * * * * * * * * * * * * * * * * * * * * * * *

making lanterns10

This year, we again made our "go-to" lanterns. I loved the balloon ones we made last year, but didn't want to do them two years in a row (not that my children would have minded!). I thought about making some out of beeswax (sort of like these), but ultimately decided against it because I wanted my children to be able to make their own lanterns.

making lanterns12

These lanterns take 3-4 work sessions. You'll need heavy-weight watercolor paper (approx. 12"x18"), high-quality watercolor paints (those that come in tubes rather than the dry ones in a tray), paint brushes, smooth boards (can be made of plastic, wood, or any smooth surface) for painting on, cooking oil, paper towels, glue, a hole punch, tealights, and yarn, ribbon, or wire to make the handle.

painting for lanterns7

painting for lanterns12

painting for lanterns8 painting for lanterns2 painting for lanterns3

The first day, we made our paintings, using the wet-on-wet watercolor painting method. I like to use paintings that are completely saturated in color for these, so this method is perfect for that. (I took a lot of pictures of our painting day this time; find more pictures here.)

lanterns - oiling

Once the paintings were completely dry, we oiled them using cooking oil and paper towels. (This picture is actually from 2006; I don't have one from this year). It is important that the paintings are completely saturated with oil. You are not going for a light coating -- you want the paper to be soaked all the way to the back. This makes it translucent once dry. Expect each one to absorb several teaspoons of oil, at least. This is really messy and they will need to dry overnight.

making lanterns1 making lanterns4

making lanterns3

The next day, we marked one of the long sides of the painting with lines that were 2" apart and 2.5" long. I cut along the lines. 

making lanterns5 making lanterns7 making lanterns9

Then we glued them into a cylinder along one of the short sides, using clothespins at the ends to hold them together, and stones to weigh them down while they dried. Once the sides were dry, we folded the notched ends over and glued them shut, once again using stones as weights while they dried.

making lanterns11

Finally, we punched holes and added our handles -- these were yarn that had been finger-knitted by Elisabeth, and glued tealights into the bottom of each lantern. It's really good for children to have running projects like this, even something like this where each work session only takes a few minutes. It's very strengthening to work on something over several days.

making lanterns14

I hope if you try these, the instructions make sense and they turn out beautifully! Let me know if you try them. Enjoy your beautiful lanterns!

For the sleepover

I made some pillowcases for Elisabeth and her friend for the sleepover.

pillowcases3

we have a pop-up trundle bed so both girls got to have a bed

I used two ready-made white pillowcases and sewed contrasting fabric and ribbon that Elisabeth had selected to the bottom.

pillowcases1

They look really cute, although the insides are sloppy. I think there must be a better way of doing pillowcases. Oh, well, they were fun for the girls to have, even if they end up falling apart at some point.

Edited: There is a better way! Next time I make pillowcases, I'm going to use Kirsten's tutorial. I figure, if you wanted to do it with ribbon, you could just leave out the trim fabric and make it with just the main fabric and the border per her instructions, adding the ribbon at the end.

pillowcases4

snow white and rose red japanese fabric

And actually, I really like them -- the colors and details -- and for something thrown together quickly, they're perfect.

pillowcases2

To accompany the eating

high chair cushions4

Of course you knew I would mention the high chair cushions, right? I made these especially for Fiona. I still have the ones I made for James -- and I love them, but I used quilt batting in them and they've become quite flat and floppy over the years.

high chair cushions2

So with these, I decided to use this stuff instead, and have been so happy with it so far! Hopefully it will stay nice and springy through many washes.

high chair cushions5

The fabric is by Kaffe Fassett (I think it was called millefiore), and I love it so much. It reminds me of the colors and motifs in the work of some of my favorite painters.

high chair cushions3

This red grosgrain ribbon actually came on a package from Alicia a long time ago -- it was still attached to its tag in my ribbon box! Thank you, Alicia -- we'll think of you every time Fiona eats.

Edited to add: The high chair itself was a craigslist find a long, long time ago.

In addition to her new mama-made cushions, Fiona has a new wee wooden mug, which is made by Heartwood Arts, a new wooden spoon, which is made by Camden Rose, and of course, her beautiful ladybug bowl from Melissa.

high chair cushions8

I try to be very mindful about the things that come into our home. (Sometimes I'm more successful at this than others....) So, if it means having only one of something, and really learning to care for it, rather than having a whole slew of (whatever it is) ... well, then so be it. We don't really need a drawer full of baby spoons and bowls and cups and whatnots. One of each really is plenty. In the end, I think we probably spend the same amount of money on a few high-quality items that we really want, and which will last for a long time, as we would on a large quantity of cheaply made ones. It means I need to wash up every time, but that's a worthwhile habit, anyway. ;) And I believe that it's important for children to have beautiful things, too.

high chair cushions7

Whether they're the cushions we sit on, the utensils we eat with, or the food itself, here's to things of beauty for us and for our wee ones!

One little, two little, three little...

...Indians!

three little indians!

Elisabeth requested an Indian costume this year, and since we're still all about the matchy-matchy, James quickly followed suit. (He really would do almost anything to be like his most beloved older sister. At least for now. It's so sweet!)

Indians

I don't know what the original seed for this costume inspiration was, but Elisabeth had something extremely specific in mind. Given the fact that this isn't very popular costume choice anymore, there were only two pattern choices among the major pattern brands carried by our local craft store. This one (McCall's M5953) was selected because it looked slightly more acceptable than the other choice. ;)

barely contained excitement

sewing

I had all the supplies (which included that cool embroidered faux-suede and four spools of "Native American" ribbon) in hand by the second week of October, and began tracing the patterns and cutting out the fabric. But some complications arose over the last 10 days or so -- some stresses that don't really have a place here, but suffice it to say that my mind was elsewhere -- and I didn't start sewing until 9pm on October 30. Yes, that's right. 9pm the night before. I sewed until 4 in the morning. And then I got up at 8:00 and sewed for 8 more hours. (With breaks to nurse the baby and not much else.) I would not recommend this.

indian maiden in her amber necklace

However, I love, love, love these costumes. You all know that I am a rather extreme perfectionist and tend to be pretty critical of what I make. Sometimes I go back and read what I've written here and it sounds like I find fault with all of my work! However, I assure you that these costumes were impressive even to my eye. I was so pleased with them!

headband

fringe

And, even more fortunately, they met with approval from my toughest little critic, as well. And what a fantastic Halloween evening to set out in a mama-made Indian costume with a belly full of soup and a neighborhood full of kind people. I was surprised (happily so) to see how little gory, gross, creepy stuff we encountered. Nothing like a sweet, happy, neighborly, handmade Halloween to restore your optimism and faith in the goodness of the world. 

ready to go!

PS: Fiona's costume was just a little raglan sleeve tunic that I came up with. I bought all the faux-leather fringe they had at our local JoAnn, and it still wasn't quite enough for her little dress to have any, and I ran out of time for pants. But she only wore it for 10 minutes, so that's OK. A few more photos of the kids in their costumes here.

Jack came to town

Jack-o-lantern, that is.

pumpkins and snow

This was the tenth year in a row that my friend Rebecca and I have carved pumpkins together. Rebecca pointed it out, and it hardly seems possible ... but it seems that it really has been that long! Anyway, from the days of the two of us working together as bank tellers -- me, a recent college graduate and newlywed, she a recent high school graduate and transplant to our state -- to the current crazy mix of husbands, babies, dogs, cats, and -- well, always the original Martha by Mail pumpkin carving kit we used that first year. Always a simple dinner of pasta, salad, and bread. And always laughter.

innards

From fancy Pumpkin Masters designs to simple, traditional designs of our own (and our favorite inspiration in the last couple of years from this book), we may have a friendship that was originally built on pumpkin carving, but it's so much more now. I love you, Rebecca!

contemplating design

carving so carefully

This year was the first that Elisabeth designed and carved her own pumpkins. (Some of these came from our garden, too!) What a mix of pride and terror trepidation there was in this mama's heart as I watched her have at it with the little knives. Oooh, but what joy and pride in my girl's eyes, to see her staying up late with the grown-ups, carving away.

contemplating design

concentration

And matching her grin to her pumpkin's:

faces

bat in the snow

How I love Jack and the memories he brings.

jack

Tomorrow: a full costume report!

For a Baby Boy due in January

We attended a baby shower this week for a baby boy due to arrive at the beginning of January.

a card for a january boy

card 2

The card, which I was very pleased with. Sometimes I feel like my cards lack inspiration, but I was really excited about this one!

t-shirts for a january boy

And some t-shirts, which are horridly photographed, but I assure you, exceptionally adorable in real life. The elephant and the snowman are Japanese prints that I hoard and then carefully portion out for appliques (because my budget for Japanese fabrics is quite limited!). (Both came from Superbuzzy, but at least two years ago.) The dog is an older Heather Ross print. And who on earth can resist a dachshund in a sweater? Also, these wee kimono tops with the mitten flaps are my favorite. I cannot believe that I had a baby tiny enough to wear something that small a mere 7 months ago.

PS: Thank you for all your bird dress love! It's so much fun to share something I really love with all of you.

The Bird Dresses

Last month I promised photos and information about Fiona's little birdie sundress. We finally had some nice days recently so I got some more pictures, although my littlest girl was a fairly unwilling model!

bird dresses10

The dresses are made using Park Slope birds fabric, which is now out-of-print. I'd been holding onto these three yards (one of the apricot and two of the turquoise) for a long time.

bird dresses1

bird dresses3

The patterns I used were found here. Fiona's was "Baby Annie" by Primrose Lane, which I adjusted to have shoulder buttons only (no back buttons), and Elisabeth's was "Louise" by The Children's Corner.

f's bird dress1

Rattle made by Papa Urchin! (And really that's a link to Mama Urchin, but I figure many of you already know Jennifer.) As an aside, I am once again so grateful for the generosity and handmade goodness that was shared with me and Fiona. You all blow me away.

bird dresses6

I made Elisabeth's without the pintucks on the skirt. The skirt of Elisabeth's was also shorter than I intended because I made a mistake cutting, and didn't have enough fabric to re-cut the skirt pieces. I ended up doing a rolled hem on the serger rather than a traditional blind-stitched hem as I did on Fiona's dress.

f's bird dress4

The buttons on both girls' dresses are vintage from my stash. The ones on Fiona's shoulders are favorites of mine which I had been saving with sundress shoulders specifically in mind for more than three years!

f's bird dress3

e's bird dress3

The placket on Elisabeth's dress gave me a great deal of frustration (there was some swearing) the night I was working on it. It could have been the late hour, or it could have been the instructions, but I tried and failed about four times before giving up. An online search for sewing plackets yielded me an amazing result and led me to my new favorite site, Children's Fashion Workshop. Thanks to Erin's wonderful tutorial, I made the placket the next morning and it was smooth sailing! (Erin's blog is beautiful, too. She's just the kind of person I'd imagine a mother bird would be.) And thanks to her, the placket turned out great.

f's bird dress6

These pictures of Fiona really remind me of the paintings of the Dutch Masters. (Oh, did I just compare my little old photography to Vermeer? I think I did just commit that faux pas.) But just look at my old fashioned-looking baby, and the light and shadow. See what I mean? I thought you might. ;)

f's bird dress5

bird dresses7

bird dresses5

I love these dresses. Even more, I love seeing my children wearing, using, something I've made with my own hands. But most of all? I love these two sisters.

bird dresses2

Seen

Some things that have been seen around here lately:

seen: costuming

Costuming in the works!

seen: baby

Some cute baby-ness, just because.

seen: star

The shadow of a star.

seen: turning

The turning of some leaves.

seen: knitting

Knitting. Of course!

* * * * * * * * * * * * * *

Some thoughts:

~I forgot to mention on Wednesday that this is out now. I'm super excited about it, although my pre-order hasn't arrived yet. I should learn my lesson and never pre-order, because I always receive my pre-orders days and days after the release day. I must live too far from any distribution sites.

~TypePad must have received a number of complaints similar to mine, because they have sort of compromised and made replying directly to comments a bit easier again. Not quite as nice as before, but at least it's something.

~And speaking of comments, I can see on my stats that lots and lots of you are still visiting, but feeling a little bit shy about commenting. Don't be! I love to hear from you. It really makes my day -- hearing your feedback, and this little conversation of ours. And I truly appreciate those of you who do take a little time out of your own day to say hi to me. Truly, truly.

Edited to add: The hat was made by Shelley! We have been lucky enough to have two of her hats and they are our very favorite.

Seasons Round exchange - Autumn

I'm finally getting around to sharing what I sent out to my partner in the Seasons Round exchange.

seasons round exchange autumn

I sent four things: a golden hand-dyed silk (I'm obsessed now), a seasonal postcard, a dragon candle that my husband made, and a standing nature table doll.

seasons round exchange autumn

seasons round exchange autumn

seasons round exchange autumn

The doll is about 4.5 inches high and is knit using Cascade 220. (Details on my Ravelry page, and more pictures over on flickr.)

You can see what my partner sent here. Very cute! One of the things I'm loving is that it gets new seasonal table items into our home without my children seeing them first. I usually change out the items on the table while they're sleeping, so this helps with the magic.

I was super happy with this exchange, and I'm glad that I get to be one of the participants for the winter exchange -- it filled up in less than a day! The next sign-ups are on January 1, 2010 -- I would recommend getting in if you can!

Virtual Quilting Bee: almost done

With these two submissions to the Virtual Quilting Bee, I am nearly finished with the project -- I have one more that is ever-so-close. The blocks that the ladies in this group have created have been amazing. I have to say that I'm glad I'm not the only one who has encountered bumps in the road to finishing -- it makes me feel a tiny bit less guilty.

Although I still feel pretty guilty, because check this out.

virtual quilting bee -- june

This one was completed in January. Uh-huh. Eight months ago. It was for Anina, although she actually already completed her (very beautiful!) quilt without my block. It's OK, though, because I am the only one who did a traditional log cabin block, and I don't think it would have necessarily fit with the others. Oh, well. (And goodness, if you're reading this, Anina, please don't think I'm giving you a guilt trip! It's my own fault.)

VQB August1

And this one was completed in March. When Fiona was just one month old. It's for Eren, and it is my very favorite of all the blocks I made for the VQB. I took about a million pictures of it, because I was so proud of the way the corners met so beautifully, the colors ... I just love it.

VQB August2

VQB August4

She wanted something that looked traditional and scrappy, and I was excited to make a traditional-looking block for her because that's my favorite quilt look.

And the one that I'm almost done with? I worked on it the week before I had Fiona, so February. So, yeah, apparently I'm even slower once I FINISH the block than I am before I start on it.

Anyway, I promise to complete it soon. Very soon.